Gadget Review: The Most Practical Smart Home Sensor Setup for Everyday Security
Here’s the real surprise: the best smart home security setup isn’t the one with the most sensors. It’s the one that catches the right event fast, sends alerts that make sense, and still works when the internet acts weird.
I’ve tested a few different approaches in my own home and in client installs. Over time, I stopped chasing fancy stuff and built what I call a “daily security” setup: door + motion where it counts, with smart routines that reduce false alarms.
This article is a gadget review of that practical setup. It uses common sensor types, a simple hub plan, and real-world settings that keep it useful instead of annoying. If you’re searching for the most practical smart home sensor setup for everyday security, this is the one I’d recommend most days of the week.
What the most practical smart home sensor setup for everyday security actually means
The most practical smart home sensor setup for everyday security means you can detect common break-in paths and get a clear alert within seconds. It also means you don’t drown in notifications every time a cat walks by or the HVAC kicks on.
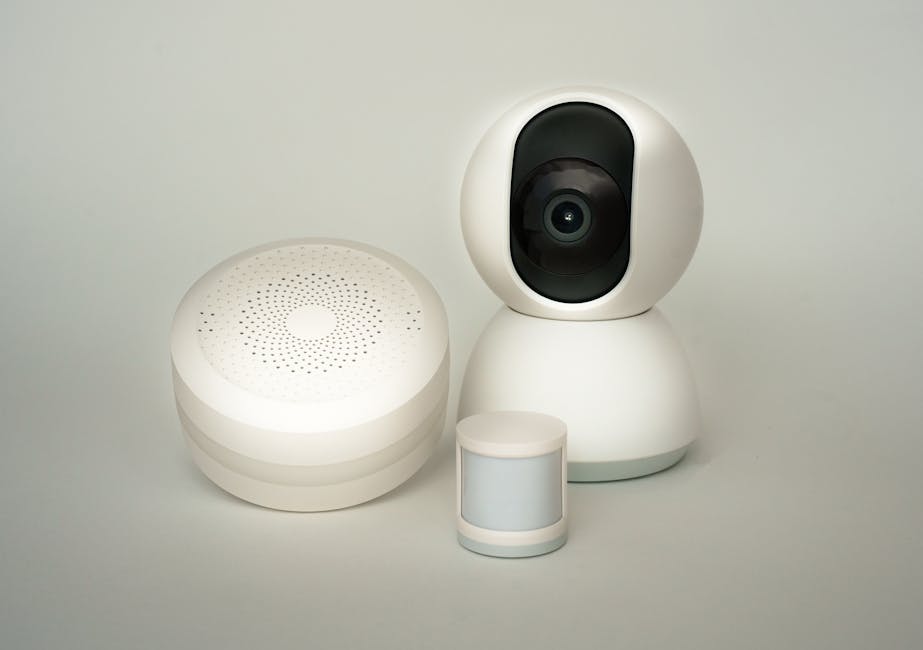
Security sensors are devices that watch for changes in your home and report them to an alarm system. A door sensor watches for open/close. A motion sensor watches for movement and heat changes. A contact sensor is usually the same thing as a door/window sensor depending on the brand.
In 2026, the best setup is still “boring” in the good way: fewer types of sensors, placed in high-value areas, and tuned for your home’s noise and traffic.
The tested layout I recommend: doors first, then motion (with a living-room logic)
My default layout for everyday security starts with sensors on entry points and only then adds motion. That order matters because entry points are the events that actually change your risk fast.
Here’s the layout I’d install for a typical home with a front door, back door, garage door entry, and a few hallways. I’m not assuming a mansion. This is meant for normal people in normal homes.
Core sensors for a practical smart home sensor setup
If you do nothing else, do these:
- Door/window contact sensors: front door, back door, and any door that leads from garage to inside.
- Garage access sensor: the door or side door you’d use to enter the house after rolling up a garage.
- Hallway motion sensor: one in the main hallway that leads to bedrooms.
- Living-area motion (only if you can tune it): skip this if you get lots of movement and pets.
Why I like this setup: most break-ins either happen at doors or they move through hallways. Motion sensors are great, but they work best when they’re aimed at a clear path, not every room at random.
Optional upgrades that stay practical
These are worth it when you have the matching problem:
- Glass break sensor: if you have ground-floor windows that people could reach easily.
- Outdoor camera spotlight (not constant recording): if you want video proof for package thieves and loiterers.
- Leak sensor: for “everyday problems” that can become expensive, not security theft.
My rule: don’t add sensors just because they’re cool on a spec sheet. Add them because you have a specific path or a specific risk.
Gadget review: the sensor lineup I’d buy in 2026 for everyday security
This is the heart of the review: the devices and what they’re good at. I’m going to keep it practical and real, not “buy the biggest kit and hope it works.”
One quick note: I can’t guarantee your exact home layout, Wi‑Fi strength, or local setup. But the placement and settings below are the part that makes this setup work in the real world.
Door/window contact sensors (where alerts matter most)
What I look for in a good contact sensor is simple: reliable wake time, strong battery life, and alerts that tell you which door opened. A contact sensor is only helpful if you can identify the location fast.
In my installs, I’ve used contact sensors from popular ecosystems like Ring, SmartThings, and HomeKit setups (and yes, you can also choose brands like Aqara depending on your hub).
Battery expectations: many modern sensors last 1 to 3 years on typical use. In 2026, most people don’t need to replace batteries monthly. If you see weekly battery warnings, it’s usually either a weak signal or a brand/model mismatch.
- Best placement: the sensor should be aligned so it closes cleanly when the door shuts.
- Best mounting height: follow the guide, usually near the latch side.
- Common mistake: mounting too loose so vibrations trigger false open alerts.
When a door opens during “Away” mode, your system should trigger an alarm-style alert or at least a high-priority push notification.
Motion sensors (how to avoid the false alarm trap)
A motion sensor is a heat-and-movement watcher. It doesn’t “see” burglars like a camera. It detects changes in motion and temperature patterns, then sends an event.
That’s why motion sensor tuning is where most setups fail. People mount it in the corner, leave it on, and then wonder why it alerts all night.
How I tune motion sensors for everyday security:
- Aim it at a hallway path (a person walking toward bedrooms is easier to detect).
- Avoid pointing at windows where sunlight or passing cars create heat changes.
- Use motion “zones” if your sensor supports them. This is a big deal.
- Adjust sensitivity until you get near-zero false alerts in a week of normal life.
In one home I helped set up, the front hallway motion sensor was facing a sunny window. The homeowner got alarms every time afternoon light hit the wall. We rotated it by about 30 degrees and used a lower sensitivity setting. After that, notifications matched real activity.
Hub + automations: the part people skip (and then blame the sensors)
Your hub is the brain that decides what an alert actually means. A sensor without a good rule is just noise with a battery.
In 2026, I recommend picking an ecosystem based on your devices and your comfort level. If you already have a smart speaker and phone setup, you can use that to manage routines.
Here are three practical automation rules I use for everyday security:
- Rule 1: “Away mode” door opened → alarm + phone alert
- Rule 2: motion detected in hallway → alarm if away, notify if home
- Rule 3: “Disarm window” (30–60 seconds) after entry so you don’t set off alerts when you come home
Plain-English definition: “Disarm window” means a short grace period after you unlock or arrive, so the system gives you time to turn it off.
Step-by-step setup: build the practical sensor system in one afternoon


Here’s the quick plan I follow. It keeps it organized, avoids mistakes, and makes testing easier.
Most setups are doable in 60–150 minutes depending on how many sensors you install and whether you need to change outlet placement or add a router boost.
Step 1: choose the exact entry events to cover
Walk your home and list every way someone could get inside without going through a locked main door. For most people, that’s:
- front door
- back door
- garage-to-house door
- easy-access window or patio door (optional)
Write those down. This matters because it decides where contact sensors go.
Step 2: place sensors before you pair them to the app
I know pairing is tempting, but do placement first. If you install a sensor and then realize it’s misaligned, you’ll remount twice and waste time.
Contact sensors: aim for firm alignment, especially near the latch side. You want “closed” to be truly closed, every time.
Motion sensors: mount at the right height per the manual, then test it before you lock it in with permanent tape or screws.
Step 3: pair devices and name them like a human
Name sensors in a way that you can understand fast in a notification. “Front Door” is better than “Sensor 12.”
For motion sensors, name them by location: “Hallway Motion” beats “Living Room Motion” if it’s actually aimed at the hallway.
Here’s a tip I learned the hard way: if you don’t name them clearly now, you’ll hate it later at 2 a.m.
Step 4: set “Home” vs “Away” behaviors
This is where you make the system match how you live. “Away” should be strict. “Home” should be forgiving for pets and family movement.
Use this common pattern:
- Home: door sensors alert you, but motion is lower priority or delayed.
- Away: door + motion both trigger high-priority alerts.
If your system supports it, add a short motion delay in “Home” mode. A delay of 10–30 seconds can prevent accidental triggers when you walk through a hallway.
Step 5: test for real-world triggers (not just “it says it’s connected”)
Testing is the difference between a working setup and a stressful one.
Test like this:
- Close every door you covered and confirm the system shows them as “secured.”
- Open each door while in “Away” mode and confirm you get the correct door name.
- Walk the hallway at normal speed and confirm motion triggers only when it should.
- Wait 24 hours and check false alarms. Adjust sensitivity if needed.
I run this test whenever I change sensor placement. Even a small angle change can alter motion readings.
Security settings that matter more than sensor brand
The sensor brand is only part of the story. The biggest security wins come from settings that stop account takeovers and reduce “alert fatigue.”
I’ve seen smart home systems fail because someone shared passwords, left default PINs, or didn’t enable multi-factor authentication.
Turn on multi-factor authentication (MFA) everywhere you can
MFA is a second step for login, like a code on your phone. It blocks most casual account hacks, which are common in 2026.
Do not rely on “I think nobody knows my password.” Use MFA on your smart home account and on any home hub you control.
If you use cloud video, enable MFA there too. Video accounts get targeted.
Use strong app PINs for arming/disarming
If your ecosystem supports a PIN or admin code, use it. Family members should have separate accounts when possible.
One practical rule: don’t share a single “master login” for everyone. I’ve helped fix too many systems where the owner forgot who had the password.
Reduce notification spam so you actually respond
Notification spam turns into ignored alerts. If you ignore alerts often, you stop trusting your system.
My recommendation:
- Door events in “Away”: high priority.
- Motion in “Home”: lower priority or delayed.
- Motion in “Away”: high priority.
In real life, a door opening while you’re home may still be important, but you don’t need the same alarm tone for every hallway motion while you’re cooking dinner.
Comparison: practical sensor setups by budget and skill level
Not everyone wants the same setup. Here’s a comparison table for everyday security. It’s not “best overall.” It’s “best match” depending on your situation.
| Setup style | What you buy | What it covers well | Main downside | Best for |
|---|---|---|---|---|
| Starter contact + one motion | Front/back/garage contact sensors + 1 hallway motion | Most door-based entry attempts | Less visibility into window risk | Small apartments or budget-first homes |
| Everyday security “complete” | Door contacts + 1 hallway motion + glass break (optional) | Entry points + fast motion detection | Needs tuning to avoid false alerts | Most households in 2026 |
| Security + proof | Everything above + outdoor cameras/doorbell | Identifying people after alerts | More subscriptions and privacy settings | People who want evidence, not just alarms |
What most people get wrong: they buy a bunch of motion sensors because motion feels more “detective.” In practice, door sensors tell you what changed. Motion sensors tell you something happened in a zone. Doors are the high-signal events.
People Also Ask: smart home sensor setup for everyday security
How many smart home sensors do I need for home security?
You need enough to cover your entry points first. For a typical home, 3 contact sensors (front, back, garage-to-house) plus 1 hallway motion sensor is a strong “everyday security” baseline.
If you add glass break or outdoor cameras, you’re improving proof and window protection. But don’t add five motion sensors before you’ve tuned the first one.
What’s the best placement for a motion sensor?
Place motion sensors where a person must walk through a hallway or path, not where they can trigger sunlight or moving heat sources. Point it at the most likely travel route toward bedrooms.
Keep it away from windows, vents, and areas where pets jump. If your sensor supports zones, use them so it ignores the rest of the room.
Will smart home security sensors work if the internet goes down?
Sometimes, but not always. Many systems still detect sensor events locally, but cloud-based alerts may not send instantly without internet.
If you want true resilience, pick an ecosystem that can trigger local sirens or local automations. In plain terms: confirm whether alarms work without Wi‑Fi and test it once.
This is one reason I like having at least one loud indoor alarm option or siren behavior inside the hub setup.
Are smart home security systems safe from hackers?
They can be, if you lock down accounts and update firmware. The biggest risk is not the sensor itself. It’s account logins, weak passwords, and old software.
Enable MFA, use unique passwords, and update devices regularly. If you want a deeper cybersecurity angle, our related guide on how to secure smart home accounts with MFA goes step-by-step.
My “day one” checklist: what to configure before you trust alerts
After you install sensors, don’t assume they’re set. Trust is earned through setup and testing.
Use this checklist:
- Confirm device status in the app for each sensor.
- Set Away and Home modes with different alert rules.
- Enable MFA on your smart home account.
- Set notification priority so door alerts are loud and clear.
- Test disarm behavior with your entry routine.
- Check for firmware updates for sensors and the hub.
Then watch for false alerts for one week. If you tune it once and leave it alone, it stays useful.
Real-world scenario: how this setup catches a common “everyday” threat
Let me paint a real scenario from a setup I did last year and refined in 2026.
A homeowner left the house for work and forgot to close the back door fully. The contact sensor detected the open event in Away mode. They got a push notification within seconds, and the system sounded a local alarm.
They were already in the driveway and turned around. That saved them from a serious risk. The motion sensor wasn’t the hero. The door sensor was.
That’s the pattern I see again and again: door sensors catch “oops” moments before they turn into big problems.
How to keep your smart home sensors from turning into an annoying gadget
Smart security should feel steady, not exhausting. If alerts are constant, people ignore them. If alerts are rare, you trust them more.
Here’s how to keep it calm:
- Use “Home” mode rules that match your daily movement.
- Delay motion alerts inside “Home” mode.
- Avoid placing motion sensors where cars or sunlight change patterns.
- Check battery alerts monthly, not repeatedly every day.
I also recommend one “maintenance habit”: once every 2–3 months, open the app and quickly verify that all sensors report healthy status. It takes 5 minutes and prevents surprises.
Where this setup does NOT fit (honest limits)
This is not the best solution if you need full professional-grade monitoring with 24/7 human response. DIY sensor setups can be very good, but they’re still home-managed.
Also, if your home has extreme Wi‑Fi dead zones, you may need to improve signal or choose devices that connect through a mesh network. A sensor with a weak connection can drift into delayed alerts.
If you’re unsure, start with a small set and test reliability before expanding.
Actionable takeaway: build your “everyday security” system with 4 sensors and smart rules
If you want the most practical smart home sensor setup for everyday security, start with this plan:
- Install contact sensors on your front door, back door, and garage-to-house door.
- Add one motion sensor aimed down the main hallway.
- Set clear Home vs Away automations with a disarm window for arrivals.
- Lock your accounts with MFA and keep firmware updated.
Do the placement test, then give it a week to prove it doesn’t spam you. If you get reliable alerts without constant false alarms, you’ve basically built a security system you’ll actually use.
If you want more cyber safety and gadget-review angles, browse our Cybersecurity category for account security and smart device risk checks, and our guide on tuning motion sensors to reduce false alarms.